The Admin menubar is specifically designed for the workspace Administrator. It has several features designed to change the behaviour of MapAble®. This is also where the Administrator can manage Users and assign passwords to them. The following Tools are available in the Admin toolbox:
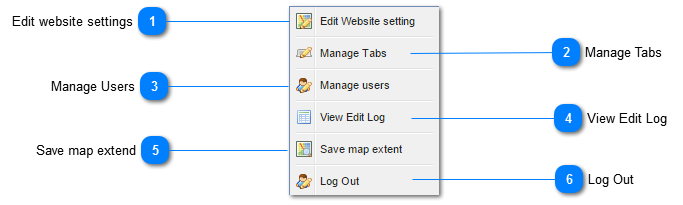
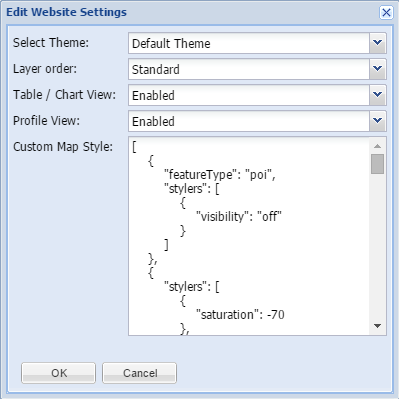
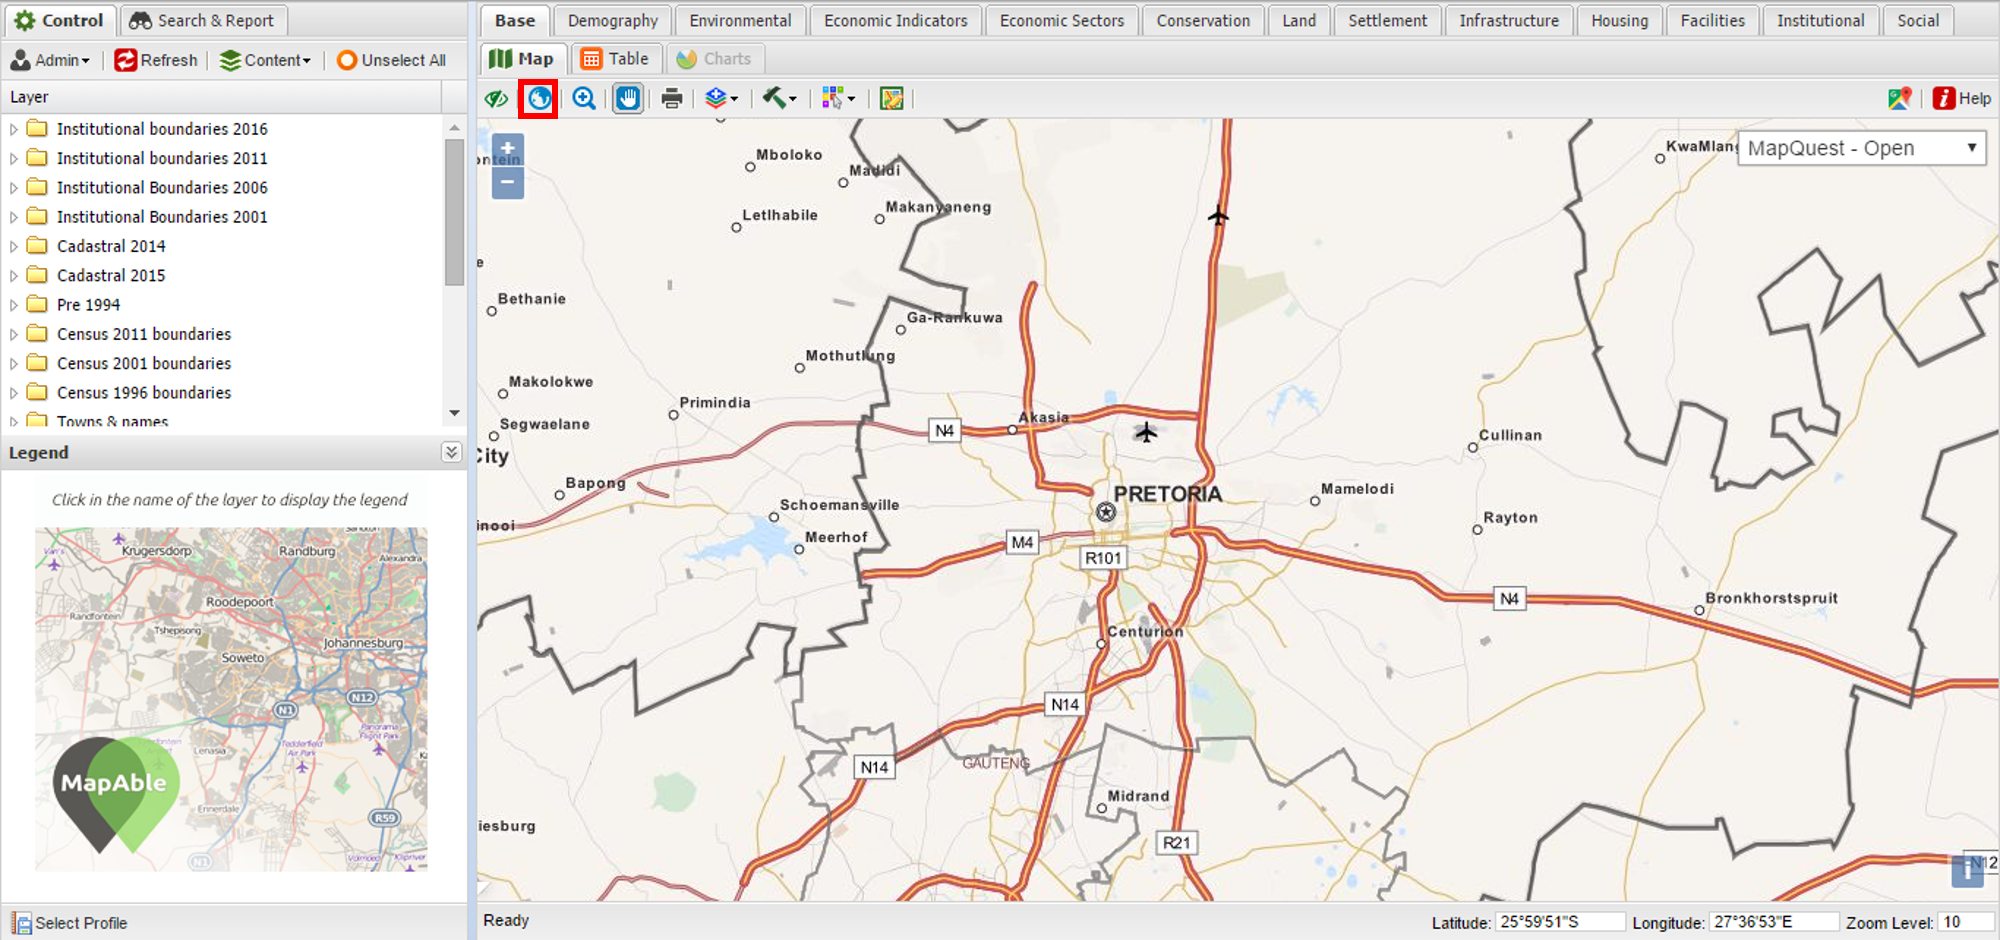
 Edit website settingsVarious look and feel as well as functionality can be activated from here. Below is a description of these tools and their settings:
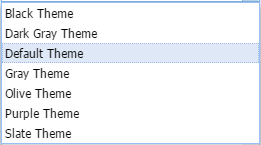
Select Theme
The user have the option to change the color scheme of MapAble® to his/her liking. 7 color schemes are currently available:
Layer Order
The layer order function lets the user choose how the drawing order of layers in the List of Layers will display on the map. Because different GIS programs handle this function differently, we leave the choice to the user. There are two choices:
-
Standard Layer Order - The layers at the bottom of the list will be placed at the top in the map -
ESRI ® Layer Order - The layer at the top of the list will be displayed at the top in the map (we named it after ESRI ® because most South Africans are familiar with the ESRI ® ArcGIS ® software
Please note: The layer order of a folder is always in the Standard Layer Order. If you use folders, it will be preferable to use the Standard mode
Table/Chart View
The user can decide if he needs to use the table and chart functionality. It can be Enabled or Disabled in the Table/Chart View tool by clicking the appropriate button:
Profile View
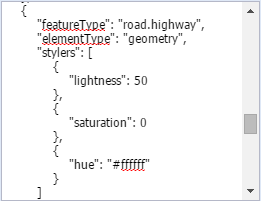
Custom Map Style (Google Street Map only)
The user can change the look and feel of the Google Street Map in the Background Maps by adding a JSON file in the Custom Map Style box.
Various already prepared JSON files are available on the web and can simply be copied and pasted in the box.
|
|
Please note:
The use of Google Maps for commercial purposes is subject to copyright. Please make sure not to infringe on any ownership or copyrights when using it. MapAble added the free Google Map services for information purposes only and strongly discourage users to use them for publication of any maps from the MapAble service.
|
To have a look at some examples, visit the following websites:
|
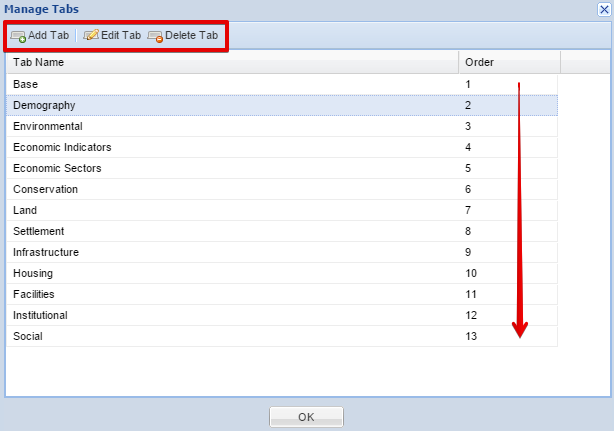
 Manage TabsThe purpose of the Topic Tabs is to assist the user in organising the data layers in logical groupings. This is especially handy when a workspace consist of many data layers which will make it impossible to have all in a single view. The topic tabs will typically be added by the workspace or content manager. Users can jump between tabs to view different layer groupings without loosing the view extend of the map.
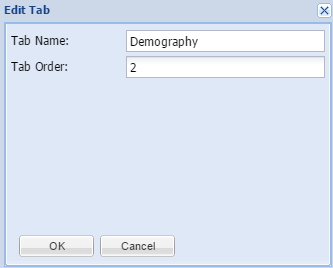
The user can add a tab by clicking on the Add Tab button. The following dialog box will open:
The user add a short name for the tab and also the order in which it should appear. It will be created after the user click the OK button. The tab can always be edited at a later stage by using the Edit Tab button.
|
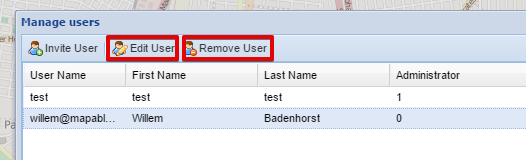
 Manage Users
Administrators can invite and manage users and their use rights from here. When clicking the Manage Users button the following dialog box will appear.
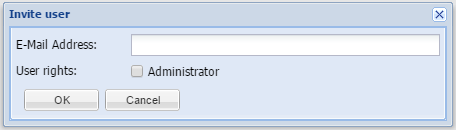
The Administrator can INVITE, EDIT or DELETE users from here. When a user needs to be invited, the following input box will appear:
The owner of the workspace can now add the email address of the desired user. The Administrator tickbox will allow the invited user to either have administrative rights or only viewing capabilities in the workspace.
Once the email address and the administrative rights are done, the user can push the OK button.
The following can now happens:
-
The user may already be a subscriber of MapAble® and will automatically be granted access to your workspace (Always make sure that the email address that corresponds with the users MapAble registration is correct) -
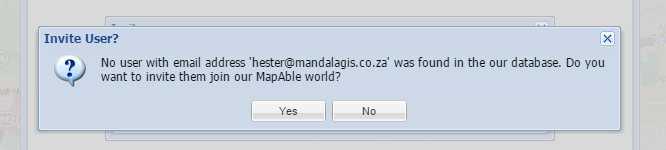
The user may not have an account with MapAble. In that case, he/she will not be granted access and will need to subscribe to MapAble ® first. If MapAble ® cannot find the email address of the invited person on it's database, it will alert the user and ask him/her if an invitation needs to be send to the recipient. The alert message will look like this:
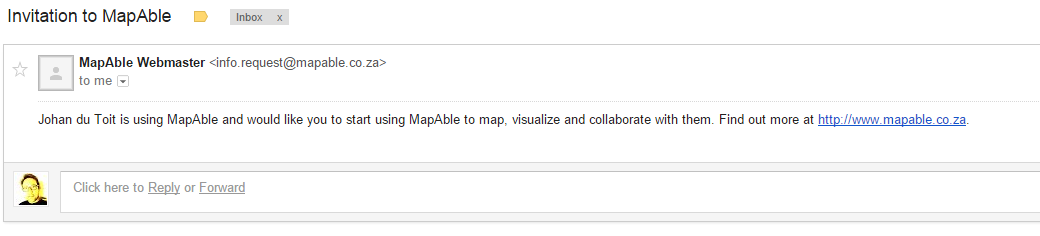
3. If the user chooses YES, an invitation to join MapAble® will be send to the recipient. It will typically looks like this:
The recipient can then follow the URL and get more information on the MapAble® website and decide if he/she wants to join the world of MapAble®.
To EDIT or DELETE a user, the following buttons can be used.
Here the Administrator can do the following:
|
 View Edit Log
MapAble records the changes in data being made by all users of a workspace. The Administrator can keep track of the data changes by viewing the Edit Log.
|
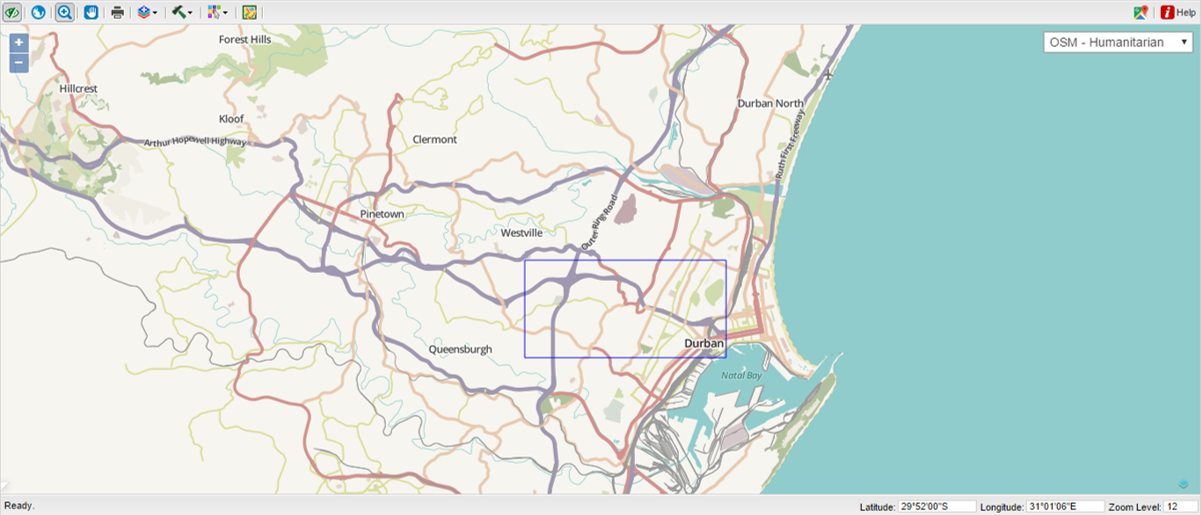
 Save map extendThe map extend is the default zoom level which the workspace will always open. This will typically being decided by the workspace administrator.
To set the map extend, the user zooms and pan to the preferred area and open and click on the "Save map extend" button. The dropdown list will disappear and the map extend is saved.
Now the user can navigate to any area on the globe....
And any time during the use of the workspace the user can return to the Default Map Extend by clicking on the Reset Zoom button in the View Pane
|
 Log OutThe Log Out Button lets the user log out of his current session and closes MapAble to return to the Login Page |
|